
Some questions to consider when creating transcript-based resources on TeachVid:
- How long should each caption be?
- Where’s the best place to split text?
- When should I join separate lines into a single caption?
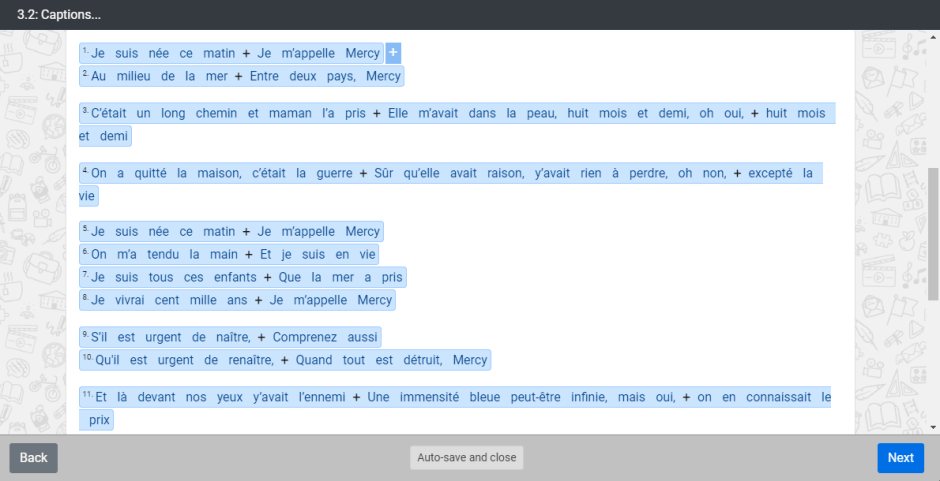
The image at the top of the post shows step 3.2 of the resource creation process, where every line of text in your transcript (from step 3.1) is shown as a blue “caption bubble”.
At this point, you can click anywhere within a caption bubble to split it into more than one caption. You would typically do this if your transcript consisted of one or more long paragraphs of text or of separate lines of text that you consider to be too long.
You can also join adjacent captions by placing your mouse at the end of the first of the two caption bubbles that you want to join. When you do this, a blue + appears at the end of this line (as shown in the top line of the image above). Click this to join the captions, and the result will be that a + appears inside the caption bubble (and if you click this again, the captions revert back to how they were previously).
So, referring again to the image above… What you are seeing here is some song lyrics, which were originally formatted like this:
Je suis née ce matin
Je m’appelle Mercy
Au milieu de la mer
Entre deux pays, Mercy
C’était un long chemin et maman l’a pris
Elle m’avait dans la peau, huit mois et demi, oh oui,
huit mois et demi
What I have done is joined the lines of the song so that those 7 lines of the song are converted into 3 captions only. Why? Because (a) it works better with the natural breaks in the audio; (b) it helps maintain the flow of the audio, avoiding stops and starts every second; and (c) because it avoids having mini-tasks based on only a few words.
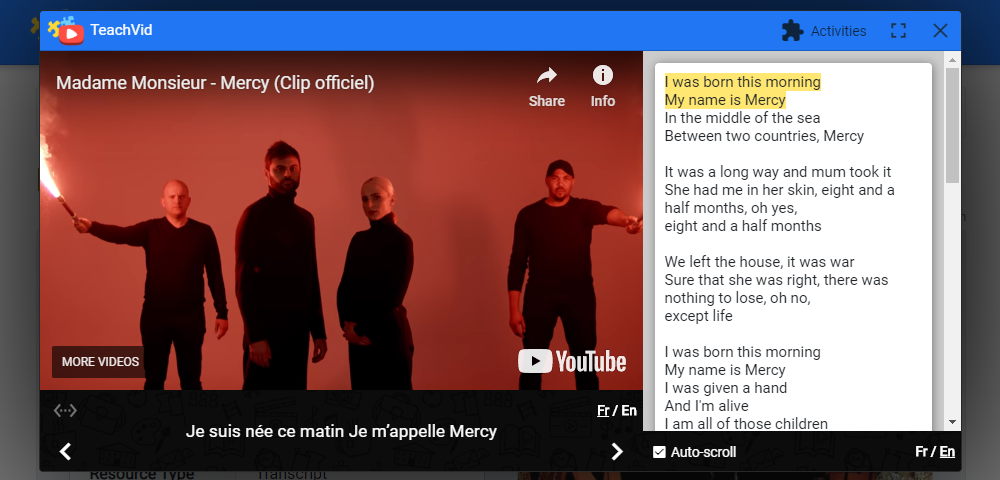
Note that, although the caption based on multiple lines appears as one line of caption below the video, the original text format is maintained for the transcript, the translation, all activities and all printables. See the image below which shows how the example given above actually displays in the TeachVid player.
So that’s an example of why you might want to change the natural format of your transcript so that it works better as part of a TeachVid resource.
Have a read of the pointers below, which are all things to consider when creating a transcript based resource on TeachVid:
1) Not too long
Aim for captions that are not too long. When creating captions, they shouldn’t ideally be much longer than the width of the white containing box (if you are creating a resource on a typical computer or laptop). Think about the fact that the caption needs to be displayed in the caption bar beneath the video during playback (and if the caption is very long, the font size will be tiny).
2) Not too short
Equally, try to avoid lots of single word captions (which you may find in dialogues with one word answers, for example). Consider the option of joining captions together where appropriate.
It may be tempting when creating resources based on a song to make each line of the lyrics into a caption. BUT this often results in a resource which stops and starts every second or two and spoils the flow of the music and the lyrics. Try combining 2 or 3 (or more) lines of the lyrics into one caption, especially if these adjacent lines of the song lyrics essentially equate to a single thought or concept.
3) Similar length
Especially when working with a transcript which is not based on the lines of a song or poem, aim for captions that are fairly equal in length. This just makes the activities work better, but it isn’t a big deal if some captions are very short and others are much longer.
4) Total number
Consider the total number of captions. Each TeachVid activity is broken down into mini-tasks based on the captions, as specified by you when you create your resource. Try to make it so that your resource has a reasonable number of these mini-tasks per activity.
(Minimum of around 10? No more than 40 if you can avoid it… Note that some song lyrics can easily go above 40 lines if you don’t combine lines to make fewer captions – which works better in practice anyway.)
5) Split by audio
Split your text into captions according to how it works with the audio. This is crucial. Your captions need to be clearly distinguishable from one another, so try to avoid placing your breaks between captions at points in the audio where the speaker is speaking very fast.
Place your breaks where there is a natural pause in the audio, as far as possible. And this includes songs – just because the lines of the song appear on separate lines, this doesn’t mean that they are separated by audible spaces. Much better to split where the audio splits than simply where the line breaks.
Here’s a link to the resource shown above so that you can see how it all works 🙂
